
COP Cam Instructions: A Comprehensive Guide
Welcome! This guide provides essential COP Cam operational details, covering setup, recording, and troubleshooting. Refer to the included instruction manual for complete safety information and detailed features.
Ensure you have Adobe Reader installed to view the PDF manuals, and always perform initial test shots to verify image quality before relying on the device.
Understanding Your COP Cam
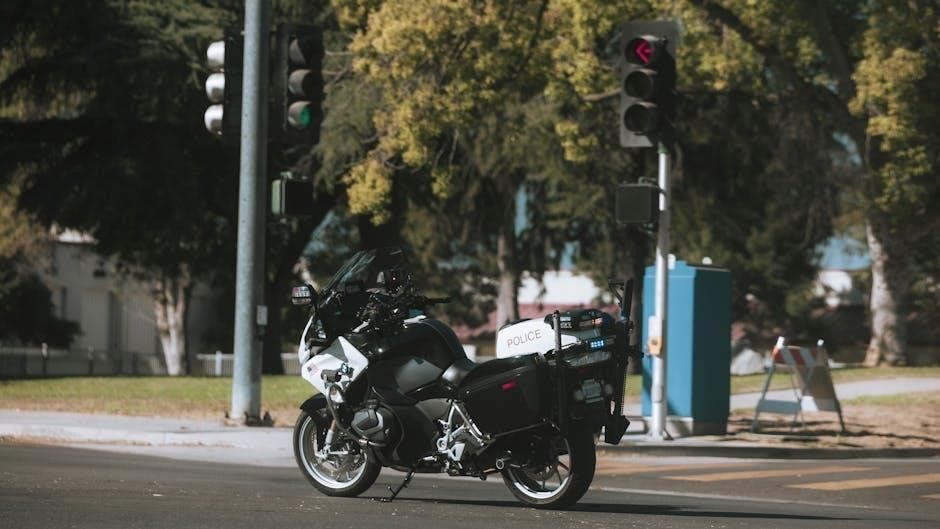
COP Security cameras, including the COP Cam, are designed for straightforward surveillance, offering a range of models suited for diverse needs. Before operation, familiarize yourself with your specific model – 15-CAH22V or 15-CO463VIC are examples – as features can vary.
This compact device functions as a hidden camera (like the HCNVMiniCube) or a standard security camera, often utilizing MPEG 4 technology for web-based viewing. The core functionality revolves around simple operation: a single power/record button initiates recording, signaled by blinking indicator lights.
Understanding the indicator lights is crucial; a red blink signifies recording, while a blue light indicates power status. Remember, the COP Cam isn’t inherently waterproof, so protection from the elements is vital. Always consult the full instruction manual for comprehensive details and safety precautions. Initial test shots are recommended to confirm proper image capture and functionality.

The Quick Start Guide provides a rapid overview, but the complete manual unlocks the full potential of your COP Cam, including DVR compatibility and advanced settings.
What is a COP Cam?
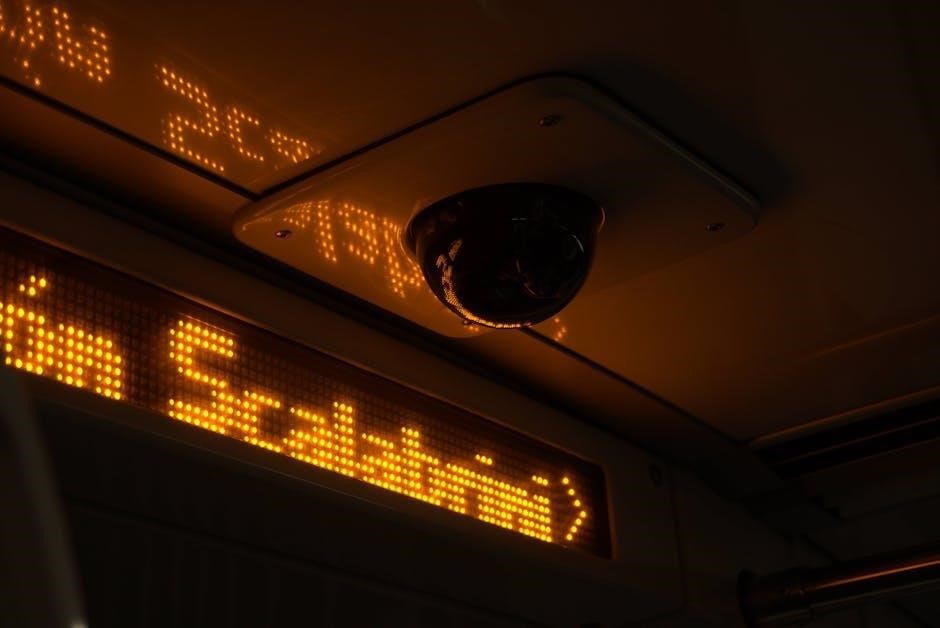
A COP Cam is a compact, versatile security camera designed for both overt and covert surveillance. Manufactured by COP Security, these cameras – including models like the HCNVMiniCube – offer a convenient solution for recording video evidence. They are often utilized as standalone devices or integrated with a Digital Video Recorder (DVR) system for expanded storage and monitoring capabilities.
These cameras typically feature simple, one-button operation for initiating recording, making them user-friendly for individuals with varying technical expertise. Many COP Cam models incorporate infrared (IR) technology for night vision functionality, enhancing their effectiveness in low-light conditions.
The devices record video, often in MPEG 4 format, and require a computer for file transfer and viewing. While some models are weatherproof, it’s crucial to remember that the COP Cam is generally not waterproof and should be protected from moisture. Always refer to the instruction manual for specific model details and safety guidelines.
Essentially, a COP Cam provides accessible, portable security recording.
COP Cam Models: Identifying Your Device
COP Security offers a range of camera models, each with specific features. Identifying your exact COP Cam is crucial for accessing the correct instruction manual and troubleshooting guidance. Common models include the 15-CAH22V and the 15-CO463VIC, each designed for different applications.
The model number is typically located on the camera body itself, often on a sticker underneath the device or within the battery compartment. It’s also printed on the original packaging. Knowing this number allows you to download the precise manual from the COP Security website or access relevant support resources.
Different models may have varying recording capabilities, battery life, and weatherproof ratings. For instance, some are designed as hidden cameras, like the HCNVMiniCube, while others are intended for more visible surveillance. The Quick Start Guide included with your device will also provide initial identification information.
Accurate model identification ensures you’re utilizing the correct procedures for operation and maintenance.
Accessing the COP Cam Instruction Manual
Obtaining your COP Cam’s instruction manual is essential for optimal use and understanding its features. The primary method is through the COP Security website. Locate your specific model number – typically found on the device or original packaging – and search for it on their support page.
Most COP Cam manuals are available as downloadable PDF files. You will require Adobe Reader, or a compatible PDF viewer, to open and read the document. These manuals contain detailed information on setup, operation, troubleshooting, and safety precautions.
Alternatively, some models may include a physical copy of the Quick Start Guide and a reference to download the full instruction manual online. The Quick Start Guide provides basic operational steps, while the full manual offers comprehensive details.
Ensure you download the manual corresponding to your specific COP Cam model to avoid confusion and ensure accurate instructions. Proper understanding of the manual will maximize your device’s functionality.
Initial Setup and Preparation
Before first use, carefully unpack your COP Cam and verify all components are present, referencing the product components list in the manual. It’s crucial to perform initial test shots immediately after setup. This confirms the camera is functioning correctly and allows you to assess the image quality.
Fully charge the device before extended use. Charging times vary by model, so consult the manual for specifics. Familiarize yourself with the Power/Record button and the indicator lights; understanding their functions is vital for operation.
Review the safety precautions outlined in the manual. The COP Cam is generally not waterproof, so avoid exposure to wet or damp environments unless specifically designed as weatherproof.
Prepare a suitable microSD card (if required by your model) for data storage. Format the card within the camera’s settings for optimal compatibility. Proper preparation ensures a smooth and reliable recording experience.
Powering On and Basic Operation
To power on your COP Cam, locate the Power/Record button. A single press initiates the device. Observe the indicator lights to confirm successful activation. Typically, the blue LED will illuminate, signifying power is on. The red LED indicates recording status.
Starting a recording is usually achieved with a subsequent press of the same Power/Record button. The red LED will blink during recording, then turn off after a few blinks, indicating recording has stopped. Refer to your specific model’s manual for precise LED behavior.
The COP Cam is designed for simple operation. However, understanding the indicator lights is key. A steady blue light means the camera is on but not recording. A blinking red light signifies active recording.
For optimal performance, ensure the camera lens is clean and unobstructed. Avoid operating the device in extreme temperatures or direct sunlight for prolonged periods. Always consult the full instruction manual for detailed operational guidance.
Recording Video: A Step-by-Step Guide
Step 1: Ensure your COP Cam is powered on. The blue indicator light should be illuminated, confirming the device is active and ready for operation. Verify sufficient battery charge for uninterrupted recording.
Step 2: Initiate recording by pressing the Power/Record button once. The red LED will begin to blink, signaling that video capture has commenced. The manual details the blinking pattern for your specific model.
Step 3: To stop recording, press the Power/Record button again. The red LED will cease blinking, indicating the recording process has concluded. The video file is now saved to the device’s storage.
Step 4: For continuous recording, some models offer a loop recording function – consult your manual. Remember to regularly check available storage space to prevent overwriting important footage.
Always review your test recordings to confirm proper functionality and image quality. Refer to the instruction manual for advanced recording options and troubleshooting tips.

Understanding the Indicator Lights
COP Cam indicator lights provide crucial feedback on the device’s operational status. The blue LED generally signifies the camera is powered on and in standby mode, awaiting activation. A solid blue light confirms power, while a flashing blue light may indicate a specific error or low battery.
The red LED is primarily associated with recording. A blinking red light indicates active video capture is in progress. The manual details the specific blinking pattern – three blinks often signify recording start/stop. A solid red light could suggest a full memory card or recording error.
Pay close attention to these signals! Consult your instruction manual for a comprehensive breakdown of each light combination and their corresponding meanings. Understanding these indicators is vital for efficient operation and troubleshooting.
If an unfamiliar light pattern appears, immediately refer to the manual or seek support. Ignoring unusual light behavior could lead to lost footage or device malfunction.
Adjusting Camera Settings
COP Cam settings customization is typically achieved through a connected DVR system, as direct onboard controls are often limited. Refer to your COP Security DVR user manual for detailed instructions on accessing and modifying camera parameters.
Common adjustable settings include video resolution (influencing image clarity and file size), recording mode (continuous or motion-activated), and date/time stamping. Motion detection sensitivity can be adjusted to minimize false alarms triggered by minor movements.
Some models may offer options for image brightness, contrast, and color saturation, allowing for optimization based on lighting conditions. Ensure settings are appropriately configured for your specific environment to maximize recording effectiveness.
Always save changes after adjusting settings and verify functionality by reviewing test footage. Incorrect settings can compromise recording quality or lead to missed events. Consult the instruction manual for specific setting recommendations.
Night Mode Functionality
COP Cam models equipped with infrared (IR) illumination offer night vision capabilities, enabling recording in low-light or completely dark environments. Activating night mode is often automatic, triggered by a decrease in ambient light levels, or can be manually enabled via the DVR system.
The instruction manual details the specific method for activating and adjusting night mode. Typically, a dedicated button or menu option controls IR LED activation. When active, the IR LEDs emit invisible infrared light, allowing the camera to capture grayscale images.

Image quality in night mode is generally lower than in daylight due to the limited light available. Adjusting the camera’s sensitivity and IR intensity (if available) can optimize night vision performance.
Be aware that reflective surfaces can cause glare in night mode. Proper camera placement can minimize this effect. Ensure the IR LEDs are not obstructed for optimal range and clarity. Refer to the quick start guide for button locations.
Weatherproof Considerations (If Applicable)
Certain COP Cam models are designed for outdoor use and marketed as weatherproof. However, it’s crucial to verify your specific model’s rating before exposing it to the elements. The instruction manual will clearly state whether the camera is weatherproof and to what degree (e.g., water-resistant, waterproof).
Even with a weatherproof rating, avoid prolonged submersion in water. Ensure all seals and connections are intact to prevent water ingress. Regularly inspect the camera housing for any cracks or damage that could compromise its weather resistance.
COP Cam is generally not waterproof, so avoid exposure to wet or damp environments unless specifically designed for outdoor use. If used outdoors, ensure it’s adequately protected from rain, snow, and direct sunlight.
Temperature extremes can also affect performance. Refer to the operating temperature range specified in the manual. Proper mounting and shielding can further enhance weather protection and prolong the camera’s lifespan.
Data Storage and File Management
COP Cam devices typically store recorded video footage on a microSD card (not always included). Ensure you use a compatible microSD card with sufficient storage capacity for your recording needs. The instruction manual will specify the maximum supported microSD card size.
Regularly check the available storage space to avoid overwriting important footage. Some models offer loop recording, which automatically overwrites the oldest files when the card is full. You can adjust recording settings to control file size and quality, impacting storage duration.
Organize your files by date and time for easy retrieval. After transferring files to a computer, create backups to prevent data loss. Consider using cloud storage for an additional layer of security.
File formats are usually .AVI or .MP4. Understanding these formats helps with playback and editing. Proper file management ensures efficient storage and quick access to your recorded video evidence.

Transferring Files to a Computer
COP Cam footage transfer is commonly achieved by connecting the camera directly to your computer using the provided USB cable. Once connected, your computer should recognize the camera as a removable drive. Navigate to this drive to access the video files, typically stored in a DCIM or similar folder.
Alternatively, if your COP Cam supports it, you can remove the microSD card and insert it into a card reader connected to your computer. This method often provides faster transfer speeds.
Ensure your computer has the necessary drivers installed for proper recognition. If prompted, install the drivers from the instruction manual’s included disc or download them from the manufacturer’s website.
After transferring, verify the files have copied correctly. Back up your footage to a secure location, such as an external hard drive or cloud storage, to prevent data loss. Always safely eject the camera or card reader before disconnecting.
Using the COP Cam with a DVR
Integrating your COP Cam with a Digital Video Recorder (DVR) expands your surveillance capabilities. Refer to your COP Security DVR user manual and the COP Cam’s instruction guide for specific compatibility and connection details.
Typically, connection involves using a BNC cable to link the camera’s video output to a DVR input channel. Power is often supplied separately, either through the DVR itself (if it supports Power over Coax) or via a dedicated power adapter.
Configure the DVR to recognize the COP Cam, assigning it a channel and adjusting recording settings like resolution and frame rate. Ensure the camera’s video format (e.g., NTSC, PAL) matches the DVR’s settings.
Proper setup allows for continuous recording, motion-activated recording, and remote viewing through the DVR’s interface. Consult both manuals for optimal configuration and troubleshooting steps.
Troubleshooting Common Issues
COP Cam experiencing problems? First, ensure the camera is adequately powered and the recording medium has sufficient space. If the camera isn’t recording, verify the On/Off button was pressed correctly – a red blinking light indicates recording is active.
Poor video quality can stem from a dirty lens; clean it gently with a soft cloth. If images are dark, check Night Mode functionality and ensure sufficient ambient light or IR illumination. Refer to the instruction manual for detailed settings adjustments.
For DVR connectivity issues, double-check cable connections and DVR channel configuration. If the camera isn’t recognized, consult both the COP Cam and DVR manuals for compatibility information.
If problems persist, review the “Low Battery Issues” section and consider contacting support. Always prioritize safety precautions outlined in the manual before attempting any repairs.
Low Battery Issues and Charging
COP Cam operation relies on a charged battery. If the indicator light flashes rapidly, or the camera powers off unexpectedly, the battery is likely low. To charge, connect the camera to a suitable USB power source using the provided cable.
Charging times vary, but allow several hours for a full charge. Avoid using fast chargers, as they may damage the battery. The indicator light will typically change color (often from red to green) when charging is complete.
If the battery doesn’t hold a charge, or the camera won’t charge at all, consult the instruction manual for troubleshooting steps. Consider replacing the battery if issues persist, ensuring you use a compatible replacement.
To maximize battery life, disable unnecessary features like continuous Night Mode when not required. Regularly check the battery level before extended recording sessions.
Cleaning and Maintenance
Maintaining your COP Cam ensures optimal performance and longevity. Regularly clean the camera lens with a soft, dry cloth to remove dust, fingerprints, and smudges. Avoid using abrasive cleaners or liquids, as these can damage the lens coating.
The camera housing can be wiped down with a slightly damp cloth. Ensure the camera is powered off and disconnected from any power source before cleaning. Do not immerse the camera in water or any other liquid.
Important: The COP Cam is generally not waterproof. Avoid exposing it to wet or damp environments unless specifically designed as a weatherproof model (refer to your instruction manual).
Store the camera in a cool, dry place when not in use. Periodically check the USB charging port for debris and gently clean if necessary. Proper care will help extend the life of your device.
Safety Precautions
Prioritize safety when using your COP Cam. Always read the complete instruction manual before operation to understand all potential hazards and safety guidelines. This device is intended for responsible use only.
Do not attempt to disassemble or repair the camera yourself. Doing so could result in electric shock or damage to the device, voiding the warranty. If you experience issues, contact customer support.
Keep the camera out of reach of children. Small parts may present a choking hazard. Avoid exposing the camera to extreme temperatures or direct sunlight for extended periods.
Crucially, the COP Cam is often not waterproof. Avoid use in wet or damp environments unless specifically indicated as weatherproof. Improper handling can lead to malfunction or damage. Always handle with care.
Ensure proper ventilation during charging and operation.
Avoiding Water Damage
Protecting your COP Cam from water damage is paramount for its longevity and functionality. Many COP Cam models are not designed to be waterproof, so preventative measures are essential. Carefully review your specific model’s documentation to confirm its water resistance capabilities.
Never submerge the camera in water or expose it to heavy rain unless it is explicitly labeled as weatherproof. Even brief exposure to moisture can cause internal corrosion and permanent damage.
If the camera is used outdoors, ensure it is adequately sheltered from the elements. Consider using a protective housing or mounting it under an overhang. Regularly inspect the camera for any signs of moisture ingress.
Important: If the camera does get wet, immediately power it off and remove the battery. Do not attempt to turn it on until it has been thoroughly dried. Clean the camera lens only with a soft, dry cloth.
Proper care will ensure reliable performance.
Warranty Information
Your COP Cam is covered by a limited warranty against defects in materials and workmanship from the date of original purchase. The warranty period varies depending on the specific model; please refer to the documentation included with your device or visit the COP Security website for details.

The warranty typically covers repair or replacement of the defective unit, at COP Security’s discretion. It does not cover damage resulting from misuse, accidents, unauthorized modifications, or normal wear and tear.
To make a warranty claim, you will need to provide proof of purchase (e.g., a receipt or invoice) and a detailed description of the defect. Contact COP Security’s customer support team for instructions on how to proceed.
Important: The warranty is void if the camera has been tampered with or if the serial number has been removed. Retain your warranty card and original packaging for future reference.

Review the full warranty terms online.
Where to Find Additional Support
Need further assistance with your COP Cam? Several resources are available to help you maximize your experience and resolve any issues you may encounter. Start with the official COP Security website, which hosts a comprehensive FAQ section, downloadable manuals, and troubleshooting guides.
You can also access the COP Security customer support team via email or phone. Contact information is readily available on their website. Be prepared to provide your camera model number and a detailed description of your problem when contacting support.
Online forums and communities dedicated to security cameras can also be valuable sources of information. Other users may have encountered similar issues and shared their solutions.
Remember to consult the instruction manual first, as it often contains answers to common questions. Don’t hesitate to reach out for help – COP Security is committed to providing excellent customer support.
Explore online resources for tutorials.
COP Cam Quick Start Guide Summary
Getting started with your COP Cam is simple! Begin by fully charging the device before initial use. Power on the camera by pressing the On/Off button; a blinking red light indicates recording has commenced. Remember to review the full instruction manual for detailed operation and safety precautions.
To initiate recording, a single press of the power button is required – the blue LED will extinguish, and the red LED will blink three times before turning off, confirming video capture. Ensure the camera lens is clean using a soft cloth for optimal image quality.
Important Note: The COP Cam is not waterproof. Avoid exposure to wet or damp environments, and do not use it outdoors without adequate protection. Always perform test recordings to verify functionality.
For complete instructions and safety information, always refer to the comprehensive instruction manual. This quick start guide provides a basic overview to get you up and running quickly.