
The Kenmore Bread Maker is a versatile kitchen appliance designed to simplify bread-making at home. With easy-to-use controls and multiple settings, it offers consistent results for various bread types, crust colors, and sizes, making it a convenient addition for home bakers of all skill levels.
Overview of the Kenmore Bread Maker
The Kenmore Bread Maker is a compact, user-friendly appliance designed to simplify the bread-making process. It features multiple preset cycles, customizable settings for loaf size and crust color, and a delay start function for convenience. The machine includes a non-stick bread pan and kneading paddles, ensuring even mixing and baking. Its intuitive interface and robust construction make it ideal for both novice and experienced bakers, offering consistent results with minimal effort. The Kenmore Bread Maker is a practical addition to any kitchen, delivering freshly baked bread with ease and precision.
Importance of the User Manual
The user manual is essential for optimal use of the Kenmore Bread Maker. It provides detailed instructions for installation, operation, and maintenance, ensuring safety and functionality. The manual includes recipes, troubleshooting tips, and guidelines for customizing settings, helping users achieve perfect results. By following the manual, users can prevent errors, extend the appliance’s lifespan, and maximize its features. Reading the manual carefully is crucial for first-time users to understand the machine’s capabilities and operation, making it an indispensable resource for both novices and experienced bakers.
Key Components of the Kenmore Bread Maker
- Bread Pan: Non-stick pan for dough rising and baking.
- Kneading Paddle: Mixes and kneads dough evenly.
- Control Panel: Adjusts settings like loaf size and crust color.
- Oven Case: Houses heating elements for baking.
Understanding the Bread Maker Parts
The Kenmore Bread Maker features essential components designed for efficient bread-making. The bread pan is non-stick and removable, holding the dough during rising and baking. A kneading paddle mixes and kneads the dough thoroughly. The control panel includes buttons for selecting cycles, crust color, and loaf size. The oven case contains heating elements for even baking. Additional parts like the pause button allow for creative control, ensuring a perfect loaf every time.
Features of the Kenmore Bread Maker
The Kenmore Bread Maker offers a range of features for versatile bread-making. It includes a horizontal loaf pan for traditional bread shapes and a pause button for creative control. Multiple pre-programmed cycles cater to various bread types, crust colors, and sizes. The delay start function allows you to set baking times in advance. Additional features include crust color selection and loaf size options, ensuring customization for every recipe. These features make it ideal for both novice and experienced bakers seeking consistent, high-quality results.

Installation and Initial Setup
Unpack and place the Kenmore Bread Maker on a stable, flat surface. Ensure proper ventilation and plug it into a nearby electrical outlet safely.
Unpacking and Placement Guidelines
When unpacking your Kenmore Bread Maker, carefully remove all packaging materials and ensure no damage occurred during shipping. Place the machine on a stable, flat surface, away from direct sunlight and heat sources. Ensure proper ventilation around the appliance for optimal performance. Locate it near a convenient electrical outlet, keeping it out of children’s reach. Remove any protective films and insert the bread pan and kneading paddle according to the manual. Ensure the area is clear to avoid interference during operation. Proper placement ensures safety and efficiency.
First-Time Setup and Calibration
Before first use, wash and dry all removable parts, including the bread pan and kneading paddle. Plug in the machine and ensure all buttons and displays function properly. Insert the bread pan into the oven case and press down until it clicks. Familiarize yourself with the control panel and settings. Some models may require calibration, so refer to the manual for specific instructions. Perform a test run without ingredients to ensure everything operates smoothly. Proper setup ensures accurate performance and consistent bread-making results.
Safety Precautions
Always unplug the bread maker when not in use and keep it out of children’s reach. Avoid touching hot surfaces and never insert metal objects into the machine.
General Safety Guidelines
Before using the Kenmore Bread Maker, read the user manual carefully to understand safety guidelines. Keep the machine out of children’s reach and ensure it is placed on a stable, heat-resistant surface. Avoid touching hot surfaces during operation, and never insert metal objects or hands into the machine. Always unplug the bread maker when not in use or during cleaning. Use only recommended accessories and follow power cord safety precautions to avoid electrical hazards.
Precautions During Operation
Always keep children away from the Kenmore Bread Maker during operation, especially during kneading and baking cycles. Never open the lid or touch hot surfaces while the machine is running. Use oven mitts when handling the bread pan or loaf. Ensure the area around the machine is clear of flammable materials. Avoid inserting any objects into the machine, as this may cause damage or electrical hazards. Keep the power cord away from hot surfaces and avoid overloading the machine with excessive ingredients.
Basic Operating Instructions
The Kenmore Bread Maker operates by simply adding ingredients, selecting desired settings, and starting the process. It automates mixing, kneading, rising, and baking for perfect results every time.
Preparing Ingredients
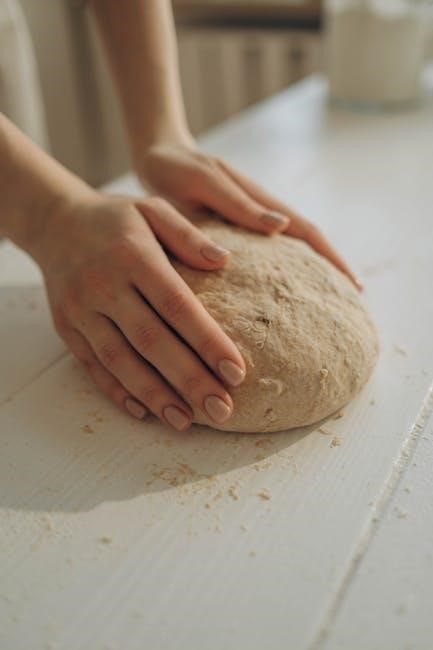
Preparing ingredients is essential for optimal bread-making results. Measure flour, yeast, salt, and sugar accurately using a digital scale or measuring cups. Add ingredients in the specified order: liquids first, followed by dry ingredients, with yeast last. Ensure all ingredients are at room temperature, especially yeast, for proper activation. Use bread flour for best texture and avoid overmixing. For beginners, start with simple recipes like the Large White Loaf or Express White to familiarize yourself with the machine’s operation.
Loading Ingredients and Selecting Settings
Insert the bread pan into the machine, ensuring it clicks into place. Add ingredients in the specified order: liquids first, followed by dry ingredients, with yeast on top. Use the control panel to select the desired cycle, crust color, and loaf size based on your recipe. For customization, use the pause button to add mix-ins like nuts or seeds during the kneading phase. Ensure all settings are confirmed before starting. For beginners, start with a simple recipe like the Large White Loaf to familiarize yourself with the machine’s operation.
Starting the Bread-Making Process
Once ingredients are loaded and settings are selected, press the Start button to begin the bread-making process. The machine will automatically handle mixing, kneading, rising, and baking. During operation, ensure the machine is placed on a heat-resistant surface and kept out of children’s reach, especially during the baking cycle. Allow the machine to complete its cycle without interruption. Once done, let the bread cool before slicing for the best results. Always supervise the machine during operation to ensure safety and optimal performance.

Advanced Features and Customization
The Kenmore Bread Maker offers advanced features like multiple bread-making cycles, customizable loaf sizes, and crust color options, along with a delay start function for convenience.
Understanding Different Bread-Making Cycles
The Kenmore Bread Maker offers various preset cycles to accommodate different types of bread, including basic, whole wheat, rapid, and gluten-free options. Each cycle is designed to optimize mixing, kneading, rising, and baking times for perfect results. Users can choose from pre-programmed settings or customize based on specific recipes. The machine also includes a delay start function, allowing you to prepare ingredients in advance and schedule baking at a convenient time. This versatility ensures that you can create a wide variety of breads with ease and precision.
Customizing Loaf Size and Crust Color
The Kenmore Bread Maker allows users to customize loaf size and crust color to suit their preferences. Choose from small, medium, or large loaf sizes to accommodate different needs. Crust color can be selected from light, medium, or dark options, ensuring the perfect finish for any recipe. These adjustable settings provide flexibility, enabling you to craft bread that matches your taste and dietary requirements effortlessly. This feature enhances the overall baking experience, making it ideal for both casual and experienced bakers.
Using Delay Start and Timer Functions
The Kenmore Bread Maker features a convenient delay start and timer function, allowing users to plan their bread-making process in advance. Simply load the ingredients, set the desired time, and let the machine handle the rest. This feature is ideal for busy households, ensuring fresh bread is ready exactly when needed. The timer function provides precise control over the baking cycle, while the delay start enables you to prepare dough or bread up to 24 hours in advance, offering flexibility and convenience for any schedule.

Maintenance and Troubleshooting
Regularly clean the bread pan, kneading paddles, and oven case to ensure optimal performance. Descaling and checking for blockages or power cord damage can prevent common issues.
Cleaning and Maintaining the Bread Maker
Regular cleaning and maintenance are essential for optimal performance. Always unplug the machine before cleaning. Wipe the bread pan, kneading paddles, and oven case with a damp cloth. Avoid abrasive cleaners or scrubbers, as they may damage surfaces. For tougher residue, soak the bread pan in warm water. Descale the machine periodically to prevent mineral buildup. Check for blockages in the bread pan or power cord. Ensure all parts are dry before storing to prevent rust or mold. Proper maintenance ensures longevity and consistent bread-making results.
Troubleshooting Common Issues
Common issues with the Kenmore Bread Maker include the machine not turning on, uneven mixing, or incomplete baking. Check if the power cord is securely plugged in and ensure the outlet is working. For uneven mixing, verify that the kneading paddle is properly seated. If bread isn’t baking fully, adjust the timer or crust color settings. Refer to the user manual for specific error codes and solutions. Regular cleaning and maintenance can prevent many operational problems. If issues persist, consult the troubleshooting guide or contact customer support for assistance.
The Kenmore Bread Maker is a reliable and user-friendly appliance for creating delicious homemade bread. By following the manual and maintaining regular care, you’ll enjoy perfect loaves effortlessly.
Final Tips for Optimal Use

For the best results with your Kenmore Bread Maker, ensure regular maintenance and cleaning. Always measure ingredients precisely and use the correct yeast type for your recipe. Experiment with different settings and recipes to find your favorites. Utilize the delay start feature for fresh bread in the morning. Store the machine in a cool, dry place when not in use. By following these tips, you’ll enjoy consistent, professional-quality bread and extend the lifespan of your appliance.
- Regularly clean the bread pan and paddles.
- _experiment with recipes for variety.
- Use the timer for convenience.